
Here i will guide you complete step by step how you can install and run AI faster at high speed using a terminal on your PC or Mac. Get your sandwich ready and do step by step process. I hope i will guide you well but in any case you have confusion, you can visit my Discussion Page.
Quick Navigation
What You’ll Learn
This guide covers how to:
- Break free from browser-based AI limitations
- Use Gemini CLI, Claude Code, Codex, and opencode in your terminal
- Maintain persistent context across sessions with context files
- Deploy AI agents for specialized tasks
- Run multiple AI tools simultaneously on the same project
- Sync context files across different AI tools
- Build custom workflows for maximum productivity
Why Terminal AI ?
Browser AI problems:
- Lost context after scrolling too far (it simply forgets what we were talking about and that’s very frustrating)
- Multiple scattered chats across different platforms
- No file system access ( yep that’s an issue )
- Copy/paste problems
- Limited control over your work
Terminal AI advantages:
- ✅ Persistent context – Your work lives in files, not chat windows
- ✅ File system access – Read and write files directly
- ✅ Multiple AI tools working together on the same project
- ✅ Complete control – Everything stored locally on your hard drive
- ✅ Professional workflows – Build custom agents and automation
- ✅ 10x faster – No more context switching or copy/paste
Guide Structure
Individual Tools
- Gemini CLI Guide – Google’s free terminal AI
- Claude Code Guide – The most powerful terminal AI
- Codex Guide – ChatGPT in your terminal
- Opencode Guide – Open-source with local model support
- DeepSeek Guide –
Advanced Workflows
- Context Files Explained – Master persistent context
- Multi-Tool Workflow – Use all tools simultaneously
- AI Agents Deep Dive – Deploy specialized AI workers
- Output Styles & Customization – Make AI work in YOUR way
Reference
- Command Cheat Sheet – Quick reference for all commands
- Troubleshooting – Common issues and solutions
- FAQ – Frequently asked questions
“Now Let’s Start”
Gemini CLI Guide
Gemini CLI is Google’s terminal AI tool. It’s FREE (with generous limits) and perfect for getting started with terminal AI.
Installation
Linux | Windows | macOS
Note:- You need to install Node.js in your system to work with npm.
Quick Node.js Installation Guide: Directly download it from the it’s official site ( Direct link: Download ) and simply run as administrator and install.
After Installation verified.
Gemini Launch
1. Create a Project Directory
Now the directory is created. after that you have to launch Gemini
Why create a directory first?
- Gemini can read/write files in the current directory
- Keeps your work organized
- Context files will be saved here
2. Initial Setup
First time you run Gemini:
- Sign in with Google account – It will opens browser automatically
- Authorize the CLI – Click “Allow” to your specific google account.
- Return to terminal – You’re logged in!
Use Simple Way
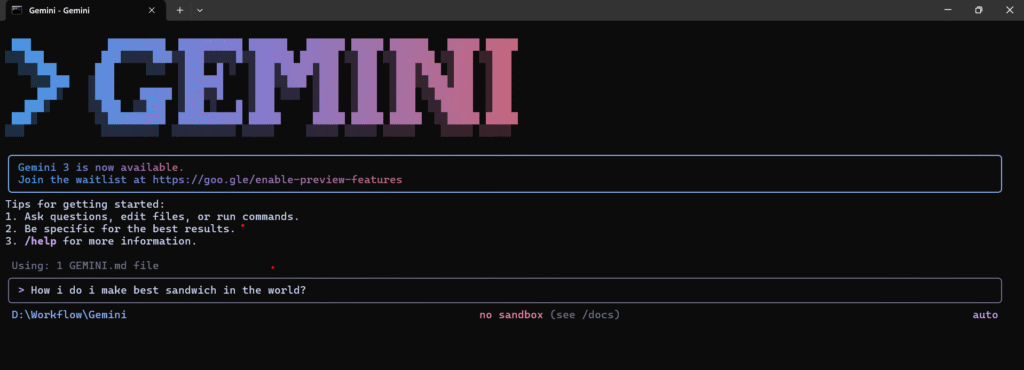
What happens:
- Gemini searches the web (if relevant)
- “Herding digital cats…” (loading message)
- Response appears with formatting

See 👆 Just a piece of sandwich.
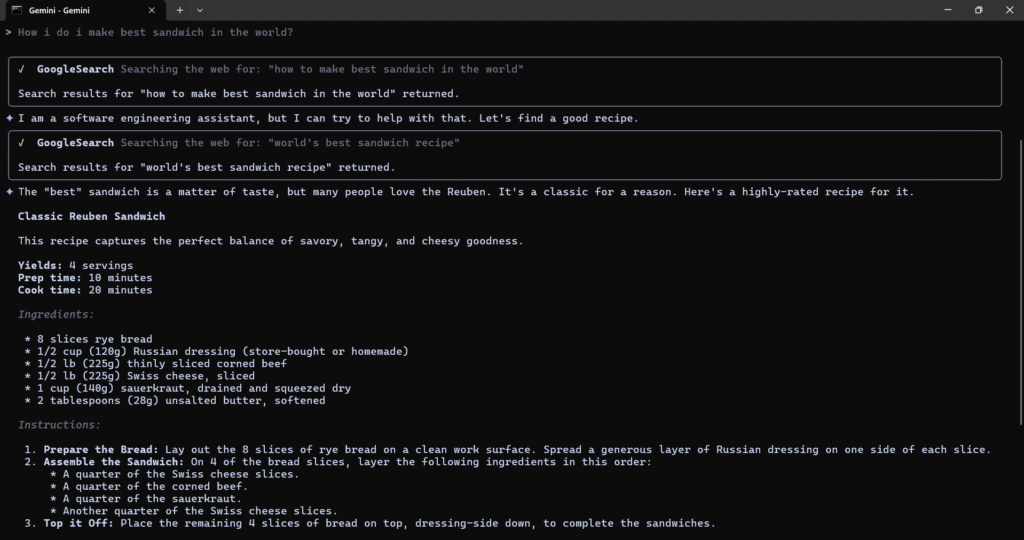
3. The Superpower: File System Access
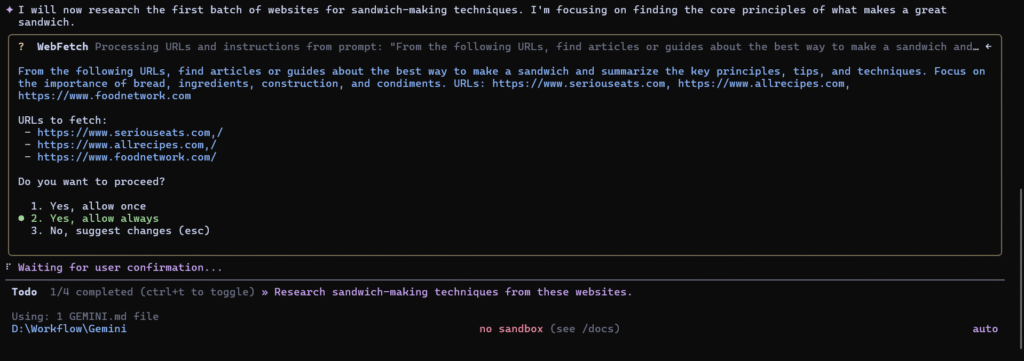
When it created a file it will ask you to write, create file permissions.
In my case, I’m allowing to always but you can make decision by allowing once or always, it’s upto you!
Done.
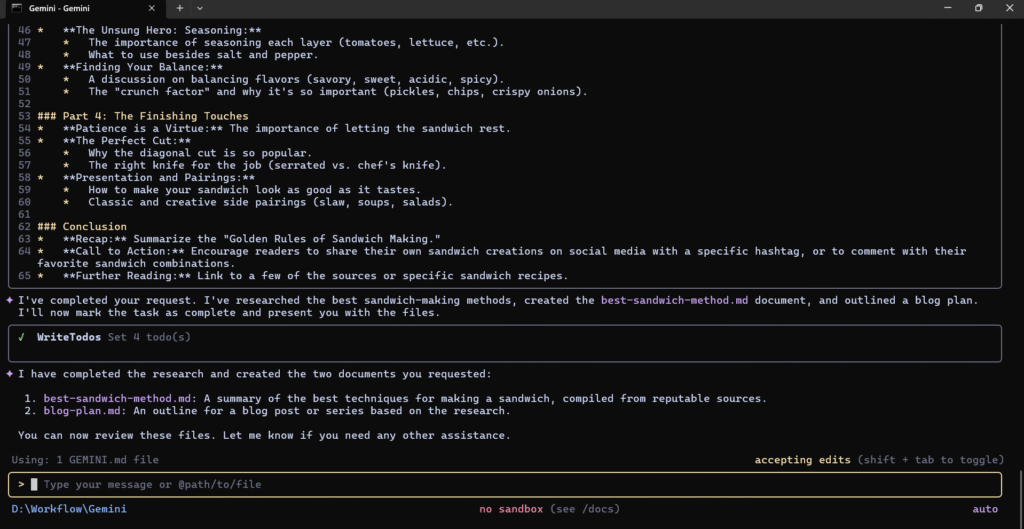
Result
Here is the file it created in seconds:
# The Art of the Sandwich: A Guide to Perfection

This guide synthesizes advice from top culinary sources on how to elevate your sandwich from a simple meal to a culinary experience. The consensus is clear: a great sandwich is built on quality ingredients, thoughtful construction, and a balance of flavors and textures.

## The Golden Rules of Sandwich Making

### 1. The Bread: The Foundation of Greatness

The most repeated piece of advice from all sources is to start with high-quality bread.
- **Flavor First:** Choose a bread that is delicious enough to eat on its own. The bread is not just a container; it's a key ingredient.
- **Structure is Key:** The bread must be sturdy enough to hold your fillings without becoming soggy or falling apart.
- **Toast for Texture and Flavor:** Toasting or grilling the bread is a simple step that adds a layer of flavor and a satisfying crunch. For extra-crispy results, let the toast rest on a wire rack for a moment to allow steam to escape.

### 2. The Spread: Your First Line of Defense and Flavor

Condiments are not an afterthought; they are essential for moisture and flavor.
- **Corner to Corner:** Spread your chosen condiment (mayonnaise, butter, aioli, etc.) evenly across the entire surface of both slices of bread. This ensures every bite is flavorful.
- **"Waterproof" Your Bread:** A fatty spread like butter or mayonnaise acts as a moisture barrier, preventing wetter ingredients like tomatoes from making the bread soggy.
- **Get Creative:** Don't be afraid to move beyond standard mayonnaise and mustard. Infuse your spreads with herbs, spices, garlic, or citrus to add another dimension of flavor.

### 3. The Fillings: Quality, Seasoning, and Balance

- **Quality Over Quantity:** Use the best ingredients you can find. High-quality meats, cheeses, and fresh, vibrant vegetables will always yield a better sandwich.
- **Season Every Layer:** Just as you would with any other dish, season the individual components of your sandwich. A sprinkle of salt and pepper on your tomatoes and lettuce makes a world of difference.
- **Texture is Your Friend:** A great sandwich has textural contrast. Pair creamy elements with crunchy ones (like adding potato chips, crisp pickles, or crunchy lettuce) to keep each bite interesting.
- **Slice it Thin:** When using deli meats, slicing them thinly and piling them high is often better than one thick slab.

### 4. The Construction: Build a Better Bite

- **Strategic Layering:** How you build your sandwich matters. Place heavier ingredients at the bottom to create a stable base.
- **Friction is Your Friend:** To prevent ingredients from sliding around, alternate slippery items (like sliced tomatoes) with more textured ingredients (like lettuce or cheese).
- **Don't Overstuff:** A sandwich packed too full is difficult to eat and the flavors can become muddled. Every ingredient should have a purpose.

### 5. The Finishing Touches: The Path to Perfection

- **Let it Rest:** Allowing a sandwich to sit for a few minutes before cutting allows the flavors to meld and the structure to set.
- **The Cut:** A clean, diagonal cut is the classic for a reason—it's visually appealing and creates a perfect first bite. Use a serrated knife for best results.
- **Presentation Matters:** Even a simple sandwich can feel special. Serve it with a side of chips, a pickle, or a small salad.
The Game-Changer: Context Files
The /init Command
What it does:
- Analyzes your current directory
- Reads all files in the project
- Creates a gemini.md context file
- Saves project understanding for future sessions
What’s in gemini.md?
It will save all the context you have done with your AI will be saved in .md file and whenever you want to ask something, it automatically fetches all the context from .md file, and BOOM it will remember everything.
No additional context needed! It knows what you’re working on.
Real-World Workflow
# Navigate to your project
cd ~/YourProjects/your-ai-terminal

# Launch Gemini
gemini

# It loads the context file automatically
# Ask about project status
> Where are we at in the project?
Gemini responds with:
- Current phase
- Completed tasks
- Next steps
- Referenced documents
Updating Context
> Update the gemini.md file with:
  - We completed the coffee brewing research
  - Next step is writing the first blog post
  - Decision made: Focus on pour-over method first
Gemini updates the file. Next session? It remembers everything.
Gemini Available Commands
Shows capabilities:
- Web search
- File read/write
- Code execution
- Data analysis
What is Context?
Every AI has a “context window” – how much conversation it can remember.
Browser AI: Hides this from you (you hit limits unexpectedly) Gemini CLI: Shows you exactly where you’re at
99% context left  ← Plenty of room
50% context left  ← Halfway through
10% context left  ← Start new session or summarize
When Context Gets Low
Option 1: Start a new session
# Exit current session
exit

# Start fresh
gemini
# Context file loads automatically!
Option 2: Ask Gemini to update context file
> Summarize our conversation and update gemini.md with key decisionsTips from Technologia
1. One Directory = One Project
# Good: Separate projects
~/sandwich-project/      → One Gemini session
~/video-optimised-script/        → Another Gemini session
~/homelab-guide-docs/        → Another Gemini session
2. Let Gemini Create Your Context File
Don’t write gemini.md manually – let /init analyze your project.
3. Update Context as You Work
> Add to gemini.md: We decided to use the French press method instead4. Context Files = Your Project Memory
Think of gemini.md as your project’s brain:
- Current state
- Decisions made
- Files to reference
- Next steps
Advanced: Multiple Gemini Sessions
Opens multiple terminal tabs with different Gemini sessions.
# Terminal Tab 1: Sandwich project
cd ~/sandwich-project
gemini

# Terminal Tab 2: Video Optimised project
cd ~/video-optimised-script
gemini

# Terminal Tab 3: Homelab Guide docs
cd ~/homelab-guide-docs
gemini
Each session loads its own context file – no mixing!
Example Workflows
mkdir research-project
cd research-project
gemini

> Research the top 5 enterprise NAS solutions for small business.
  Include pricing, features, and pros/cons.
  Create a comparison document called nas-comparison.md

> /init

> Based on the research, write a recommendation for a 10-person company
  with 5TB storage needs. Save as nas-recommendation.md
Writing Workflow
mkdir blog-series
cd blog-series
gemini

> Help me plan a 5-part blog series about network security basics.
  Create an outline file.

> /init

> Write the introduction for part 1. Save as part-1-intro.md

# Later (new session):
gemini

> Review the part-1-intro and suggest improvements
Obsidian Integration
# Navigate to your Obsidian vault
cd ~/Obsidian/MyVault
gemini

> Read my daily note for today and summarize key tasks

> Create a new note about [topic] with backlinks to related notes
Gemini Troubleshooting
Context File Not Loading
# Make sure you're in the right directory
pwd
ls gemini.md

# Recreate if needed
> /init
Web Search Not Working
Gemini needs internet access. Check your connection.
Gemini Pricing & Limits
Free Tier
- Generous usage limits (exact limits vary)
- Gemini 2.5 Pro model (latest and greatest!)
- Web search included
- No credit card required
Google One AI Premium ($20/mo)
- Higher rate limits
- Priority access
- Integrated with other Google services
What’s Next?
Now that you understand Gemini CLI, you’re ready for the big leagues:
➡️ Claude Code Guide – Technologia daily driver with AI agents
Or explore:
➡️ ChatGPT Complete Guide
➡️ DeepSeek Complete Guide
➡️ OpenCode Complete Guide
Frequently Asked Questions
Which tool should I start with?
Start with Gemini CLI if you want free access. It’s generous and perfect for learning the concepts.
Is this just for developers?
Absolutely not!. They work for:
Writing and content creation
Research and analysis
Project planning
Documentation
Any text-based work
Coding is just ONE use case.How much does this cost?
Gemini CLI: FREE (generous limits)
Can I use existing AI subscriptions?
Yes!
Can AI access all my files?
Only files in the directory where you launch it.
Can I access my Obsidian vault?
Yes! Just launch the AI in your vault directory.


6 Comments